Introduction#
Currently, I am a teaching assistant for Programming 1.
The IPs of the computers in the lab are internal network IPs.
The Online Judge VM for the course only allows school IPs (140.116.xxx.xxx) to connect,
and does not allow internal network IPs.
Originally, I used ngrok for NAT,
but the free version of ngrok only allows 40 users per tunnel.
With over 240 students, it is impractical to set up 6 tunnels and distribute them to the students.
This is very cumbersome…
Additionally, every time ngrok restarts, it changes the domain.
This requires students to reset their connection domains each time.
Alternative to ngrok#
The free plan of Cloudflare Tunnel includes:
- DNS setup
- No connection limitations (the name server must be on Cloudflare)
- Other features similar to ngrok
Cloudflare Tunnel Documentation#
https://developers.cloudflare.com/pages/how-to/preview-with-cloudflare-tunnel/
Installation#
You can find the appropriate version for your OS at Cloudflare Tunnel Downloads.
For Mac OS:
brew install cloudflare/cloudflare/cloudflaredFor Linux:
wget https://github.com/cloudflare/cloudflared/releases/latest/download/cloudflared-linux-amd64.deb
sudo apt install ./cloudflared-linux-amd64.deb
Normal Usage#
For ngrok:
ngrok http 8888For Cloudflare Tunnel:
cloudflared tunnel --url http://localhost:8888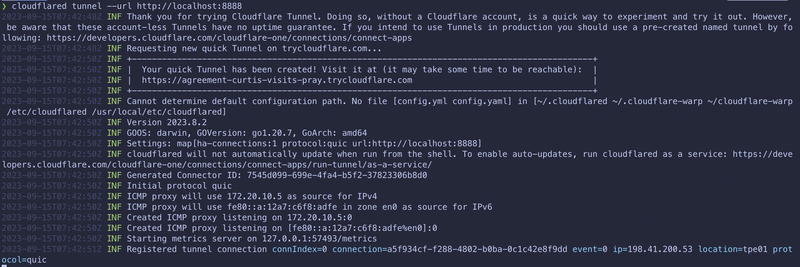
This generates a random URL to connect to localhost:8888.
If you want to set your own domain, you need to configure the cloudflared config file.
Advanced Usage#
Before setting the domain, ensure that the domain’s Nameserver is set to Cloudflare.
After setting it up, you can connect to the server’s
localhost:<port>through your DNS.
Next, use the command line to set up the cloudflared config file.
- Authentication
cloudflared tunnel login - Create a Tunnel
cloudflared create <tunnel_name>This will generate acloudflared tunnel route dns <tunnel_name> <domain_name><tunnel_id>.jsonfile in~/.cloudflared/.
You can see the <tunnel_id> under Access -> Tunnel in the Cloudflare dashboard.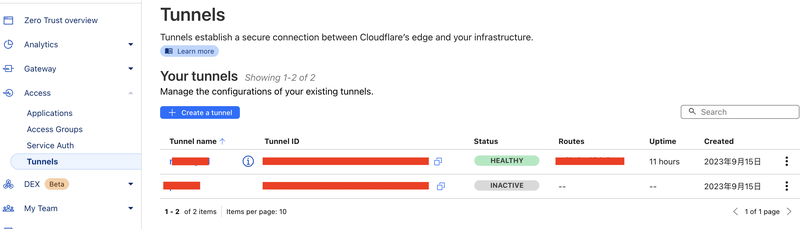
In DNS -> Records, you will see the added <domain_name>.
The content part will be <tunnel_id>.cfargotunnel.com.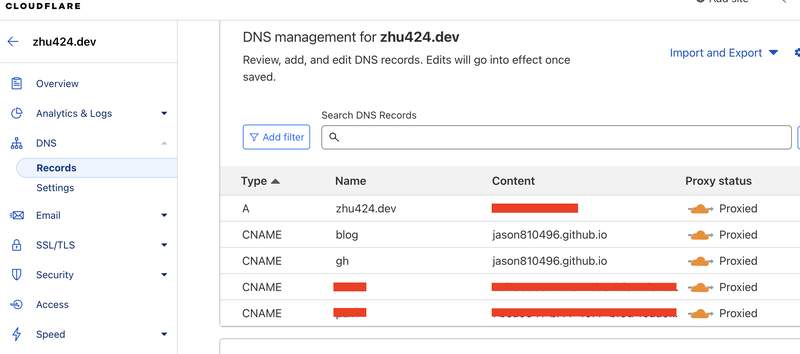
Configuration#
Cloudflare Tunnel: Setup Configuration File
Next, add a config.yaml file in ~/.cloudflared/.
tunnel: <tunnel-id>
credentials-file: /path/to/<tunnel-id>.json # The previously generated JSON file in ~/.cloudflared/
ingress:
  - hostname: <domain-name>
    service: http://localhost:<port1>
  - service: http_status:404
When setting up config.yaml, you can configure multiple ingress entries.
This allows different ports to correspond to different domains.
For example:
localhost:8888corresponds toservice1.domain.comlocalhost:9999corresponds toservice2.domain.com
Start Tunnel#
To start the tunnel:
cloudflared tunnel run <tunnel_name>You can use tmux to keep the tunnel running in the background.
Refer to tmux Common Commands!
Using tmux:
tmux new -s cloudflare-tunnelThen run cloudflared tunnel run <tunnel_name> inside tmux.
Press ctrl + b, then d to detach from tmux.
To reattach to tmux, use tmux attach -t cloudflare-tunnel.
Command List#
cloudflared tunnel logincloudflared create <tunnel_name>cloudflared tunnel route dns <tunnel_name> <domain_name>This generates a
<tunnel_id>.jsonfile in~/.cloudflared/and addsconfig.yamlhere.
You can see the<tunnel_id>underAccess->Tunnelin the Cloudflare dashboard.cloudflared tunnel run <tunnel_name>